How to get started with @HOME

@HOME is for personal use, where you register your projects, contracts and groups. 
This article will guide you through all the important steps to get you started with @HOME.


My settings


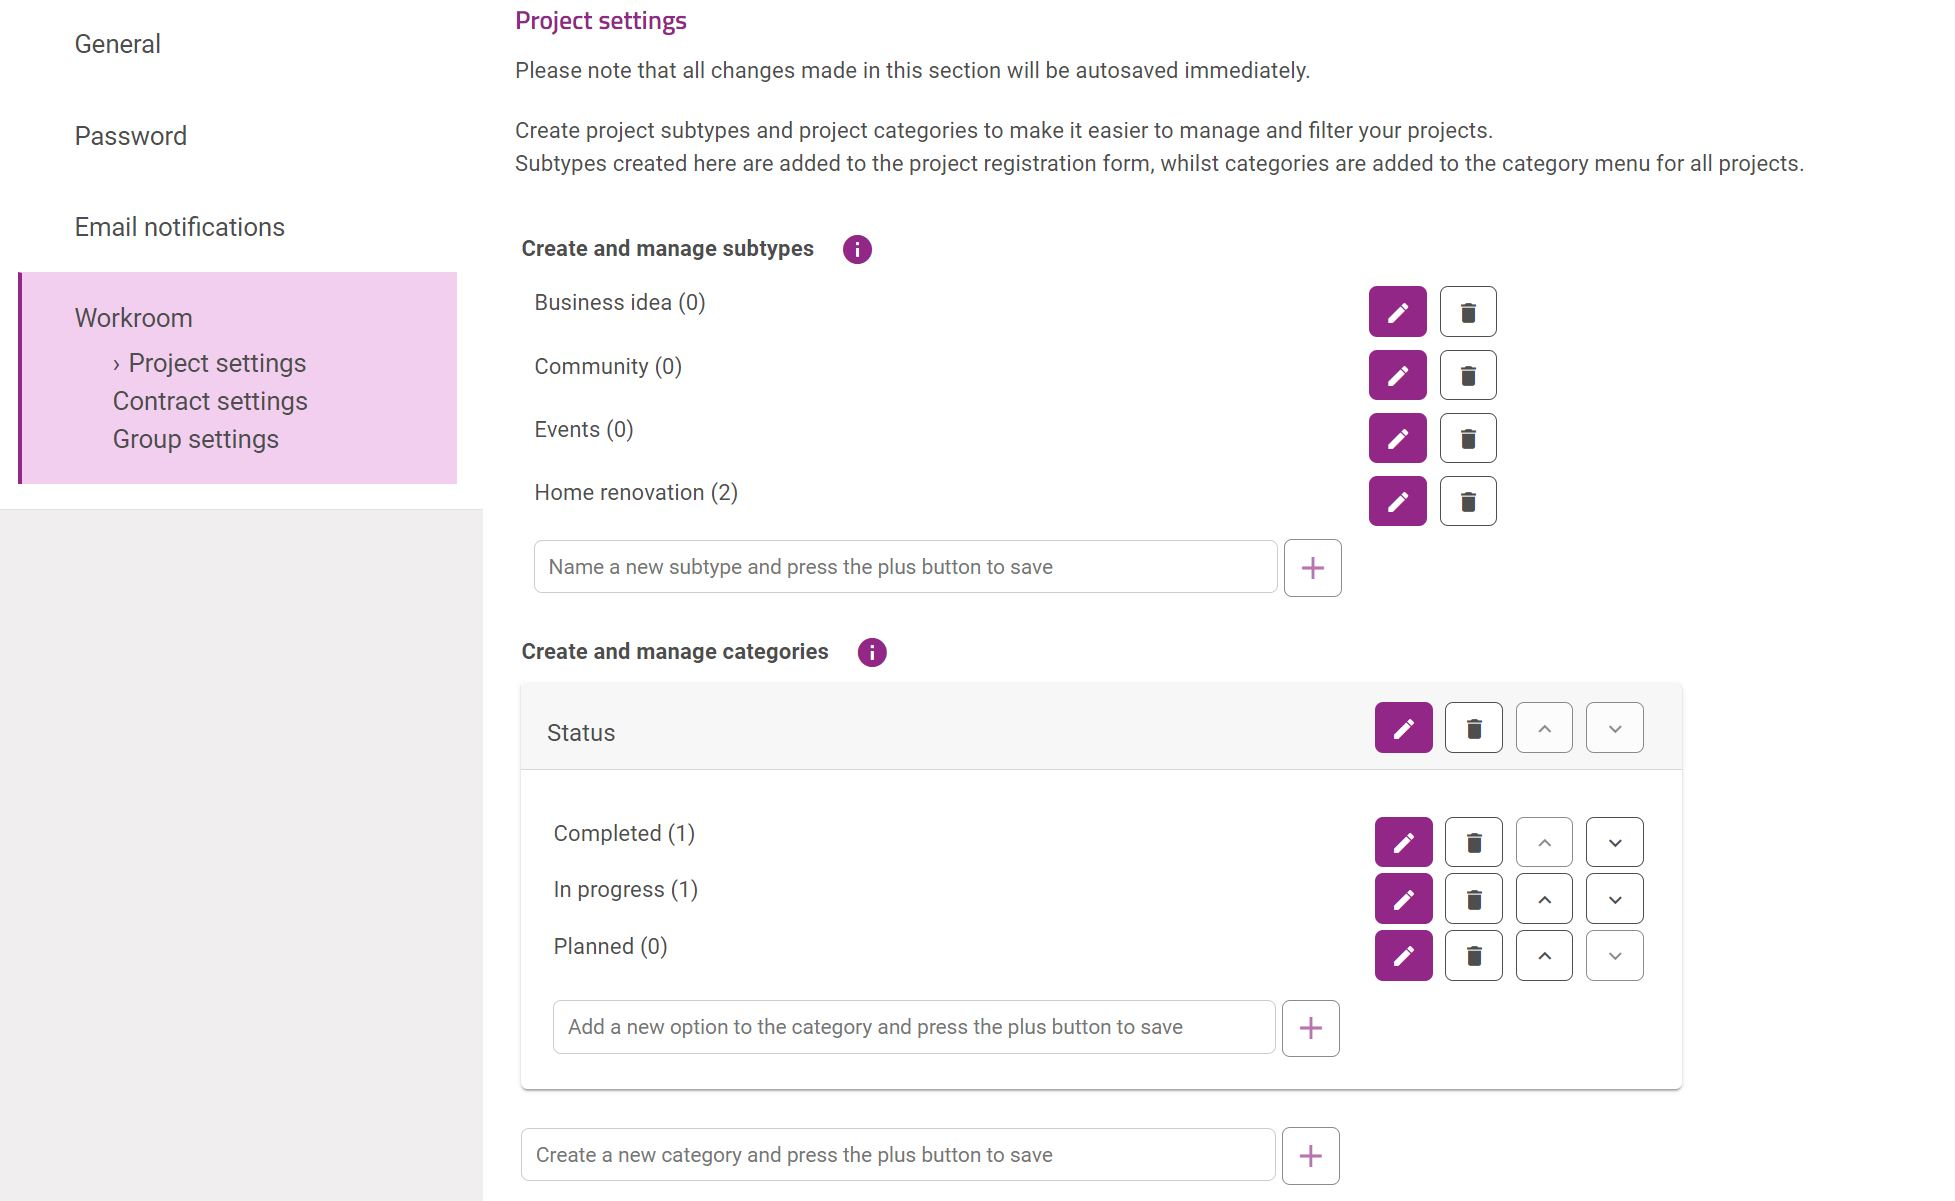
First tings first - before you register your workrooms, we recommend to create your categories. This makes it easier to manage and find the information you register. To manage you categories, go to My settings and My workrooms. From here, you can turn on and off the types of workrooms you want to use. 

To add categories, click Project-, Contract-, or Group settings.


In the project/contract/group settings, you are able to create and edit subtypes and categories to make it easier for you to manage and filter your workrooms. Subtypes created here are added to the registration form, whilst categories are added to the category menu in the workroom.


My workrooms


My workrooms is where you find all of your projects, contracts and groups. Use the filter on the left-hand side to easier find the workrooms you are looking for.  Click on the purple buttons at the top left-hand side to register. 


Write in a title and check on of the subclasses you have created.


After registering, you should add a description to describe what the workroom is for. Click the Edit button


Dialog


Use the dialogue to maintain a good communication in the team and ensuring everyone is up-to-date.
This is where team members and any externals that you have given access can share information and discuss. Like facebook, linkedin, Instagram and other social media platform, you can comment, like and comment on other comments


Documents


Use the document area for all files and documents that are relevant to the content. You have unlimited storage for every content. Use this as an efficient way to collect all documentation in one easy to access place.


Team


This is where you can view and manage team members. You will be able to see all team members and invite or remove members.


To invite other user to the team, write their name and click on the correct user that appears in the list and click “Send invitation”. You can send an invitation to multiple users.

If the user does not appear, they are either not a member of the community.

To connect to users, search after their name in the search bar at the top and click "Get connected" next to their name.
Tasks 

Use tasks to keep the content moving forward by allocating tasks with due dates to team members.


Categories


Apply relevant 
categories to you workroom. This will be helpful for searching and sorting among workrooms in your workspace. Once you have built a large portfolio, you will be glad to have this. Available categories are made available by the person(s) administering this workspace.

Simply check the correct categories or subtypes for the content. Remember to save!


Settings

In the settings you decide who has access to administrate this content, and what the team members and community members have access to. You will also be able to transfer administration to another person. You may also delete the content from settings.


Was this article helpful?

That’s Great!

Thank you for your feedback

Sorry! We couldn't be helpful

Thank you for your feedback

Let us know how can we improve this article!

Select at least one of the reasons
CAPTCHA verification is required.

Feedback sent

We appreciate your effort and will try to fix the article